The vCloud Portable Lab: Part One
You may have heard some news about something called VMware vCloud ![]() Well, the vCloud solution has multiple components comprising of technology and process. One of the key ingredients is the vCloud Director component. What you may not know is that currently vCloud Director only supports Oracle for its database. That’s right, no MS SQL support, just good old reliable Oracle.. or so I was told. Oracle was a minefield for me, having not used it before. So to try and save some of you the horror that I went through, I’m going to provide you the shortcuts. You may also be wondering why I am going to use Oracle Express to provide the database for my vCenter server and not use MS SQL/SQL Express… well, practice and use (and pain..) makes perfect!
Well, the vCloud solution has multiple components comprising of technology and process. One of the key ingredients is the vCloud Director component. What you may not know is that currently vCloud Director only supports Oracle for its database. That’s right, no MS SQL support, just good old reliable Oracle.. or so I was told. Oracle was a minefield for me, having not used it before. So to try and save some of you the horror that I went through, I’m going to provide you the shortcuts. You may also be wondering why I am going to use Oracle Express to provide the database for my vCenter server and not use MS SQL/SQL Express… well, practice and use (and pain..) makes perfect!
Oracle 10g Express
Before we talk about Oracle and installing it on to the vCenter server, do yourself a favour and turn off the Windows Firewall. This is a lab, you can configure it if you want to, but to keep this simple I am going to assume that you will follow the above advice.
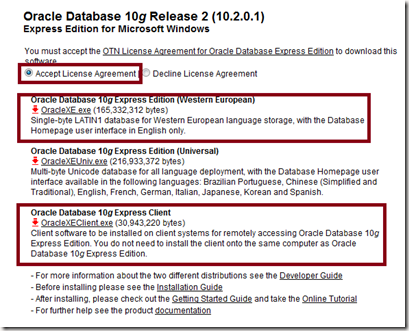
Ok, to start with you are going to need to grab some software from Oracle and download it to your vCenter server. Don’t panic! The registration process on Oracles website is quick and easy. Point your web browser over to Oracles Express Site. You need to download Oracle Database 10g Release 2 (10.2.0.1) for Windows. If you are being lazy looking, you can find it here. Don’t forget to accept the License Agreement.
You are also going to need two other items from Oracle to enable the creation of a 64bit database connection.
You need to go to this page and download following from the Version 10.2.0.5 section:
Now we finally have what we need to install Oracle!
Installing Oracle 10g Express
On the vCenter server you need to run the OracleXE.exe file. The installation is pretty straightforward; make sure you perform it logged on as the local administrator.
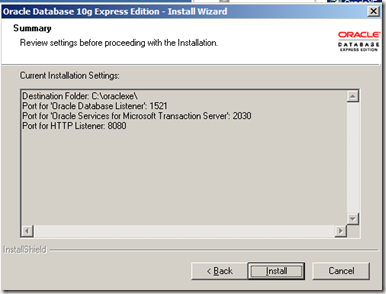
The observant ones of you may notice something in the summary dialog box – the Port for HTTP Listener is set to 8080. This is going to conflict with the vCenter installation. You can’t change the port from 8080 during the installation, but you can do afterwards. I’ll even tell you how to do it.
Once the installation is complete, we will need to carry out a few actions
- Change the listener port from 8080 to something else (8081)
- Create a database account for the vCenter server to use
- Create the 64bit ODBC system connection
In the meantime, run the OracleXEClient.exe file and install the Oracle Express Client. Once you have, keep on reading!
Oracle 64bit ODBC
Extract the following two downloaded zip files in to a folder. You want to combine the extracted contents from both zip files in to a single folder.
- instantclient-odbc-win64-10.2.0.5.zip
- instantclient-odbc-win64-10.2.0.5.zip
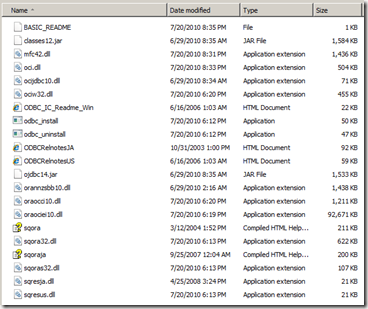
You will end up with 21 files in a single folder, as below
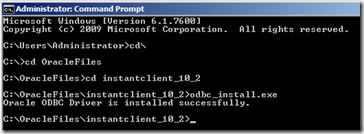
Open a command prompt window (it must be run as administrator) and change directory to the above folder. Run the ODBC_Install.exe file.
Now we need to configure an environment variable so the system knows where two specific files are (tnsnames.ora and sqlnet.ora). If you have been accepting the default paths during the above installations, then the files are in the following path:
C:\oraclexe\app\oracle\product\10.2.0\server\NETWORK\ADMIN
Copy the sqlnet.ora and tnsnames.ora files from the above location in to the location where you extracted the two zip files. So for me, this was
C:\OracleFiles\instantclient_10_2
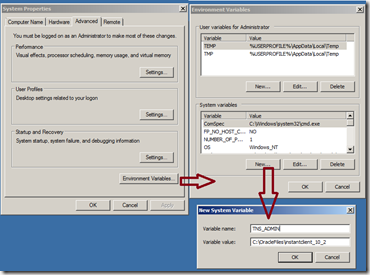
From Computer Properties, Advanced System Settings, Environment Variables we create a new system variable as below
Variable Name: TNS_ADMIN
Variable value: <folder path to files>
Now we are going to create a ‘database’ for vCenter and a user account for the connection in Oracle. First of all, create a folder called vpx in the following location
C:\oraclexe\oradata\vpx
From the Oracle programs group under the Start Menu, launch a SQL Command Line session
Enter the following commands:
connect
system
<your password>
CREATE USER vpxAdmin IDENTIFIED BY vpxadmin DEFAULT TABLESPACE vpx;
grant unlimited tablespace to vpxAdmin;
Exit
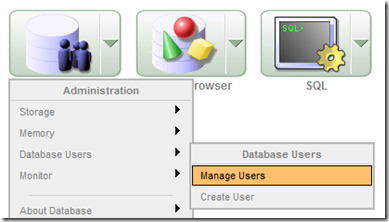
From the Oracle programs group under the Start Menu, launch the ‘Goto Database Home Page’ link. Login using system as the username and the password you provided during install. From the Administration section, select the Manage Users option.
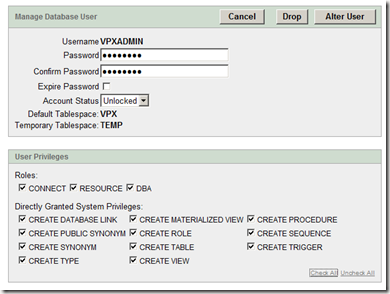
Enter a password for the VPXADMIN user and configure the options as per the below screenshot. Click Alter User to save the changes.
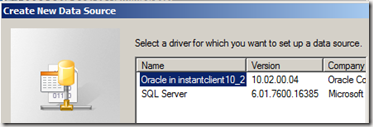
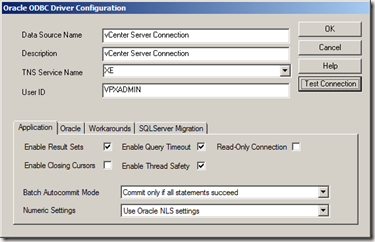
Now we are finally ready to create our 64bit Oracle System DSN. From Administrative Tools, launch the ODBC Data Source Administrator Tool. From the System DSN Tab, click Add and select the Oracle 10.02.00.04 driver.
Configure the connection as follows:
Data Source Name: vCenter Server Connection
Description: vCenter Server Connection
TNS Service Name: XE
User ID: VPXADMIN
Click ‘Test Connection.’ When you are prompted enter the password you specified in the previous steps.
Assuming that the test is successful, click OK.
Congratulations! You can now install vCenter Server and connect it to the Oracle Database!
